


In the fast-paced world of motorsports, tech advancements play a crucial role in enhancing performance and gaining a competitive edge. One essential tool that has revolutionized how teams analyze and optimize their vehicles is a race telemetry system. This guide aims to provide a comprehensive overview of how to install a basic telemetry system, ensuring you can collect, monitor, and interpret vital data during races.
Installing a telemetry system may seem daunting, yet it is a manageable process with the right approach and understanding. The installation involves connecting sensors to various parts of the vehicle to gather data on parameters such as speed, acceleration, tire pressure, and engine performance. This information is then transmitted in real-time, allowing teams to make informed decisions regarding strategy and vehicle setup. By integrating this technology, race teams can enhance their performance and achieve better race results.
Throughout this guide, we will break down the key components of a basic telemetry system, step-by-step installation instructions, and best practices for data analysis. Whether you are a seasoned racer or just getting started, mastering this critical aspect of race preparation can significantly impact your journey on the track.
Choosing the Right Telemetry Hardware for Your Race Setup
Selecting the appropriate telemetry hardware is crucial for optimizing your race performance. The right tech can provide essential data that enables you to make informed decisions while on the track. Factors such as compatibility, accuracy, and ease of use should be prioritized when making your choice.
First and foremost, ensure the telemetry system is compatible with your vehicle’s existing electronic setup. Compatibility with the engine control unit (ECU) and other onboard sensors is imperative for seamless data acquisition. Investigate the options available that can interface smoothly with your specific race vehicle.
Data accuracy is another critical aspect. High-quality telemetry hardware should offer precision in measurements such as speed, tire temperature, and engine performance metrics. Look for systems that utilize advanced sensors known for their reliability, as this will enhance the quality of the insights you gain from the telemetry.
Ease of installation and user-friendliness also play significant roles in your selection process. Opt for systems that provide straightforward setup instructions and intuitive software interfaces. This allows for quicker adjustments and more time focused on racing rather than troubleshooting tech issues.
Don’t overlook the communication method employed by the telemetry hardware. Wireless options can provide real-time data streaming without the clutter of cables, while wired solutions might offer lower latency. Weigh these options based on your specific race environment and data needs.
Lastly, consider the expandability of the telemetry system. As your racing career evolves, you might wish to incorporate additional sensors or data channels. Choosing a system that allows for future upgrades can save you time and costs in the long run.
In summary, the right telemetry hardware is essential for maximizing your race setup. Prioritize compatibility, accuracy, ease of use, communication type, and expandability to make a well-informed decision that enhances your race performance.
Step-by-Step Installation Process for Telemetry Sensors
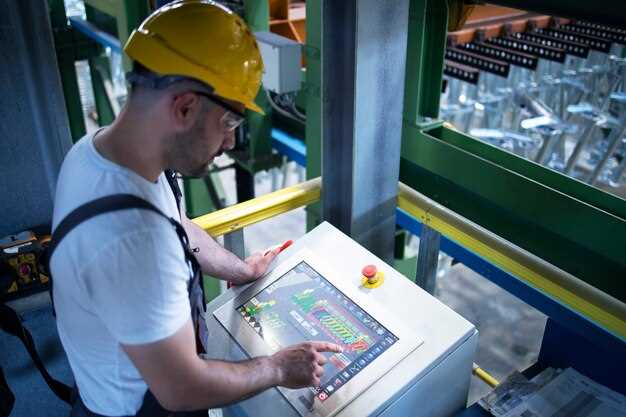
Installing telemetry sensors in a race vehicle involves several essential steps to ensure accurate data collection and optimal performance. Follow this guide to set up your telemetry system effectively.
1. Gather Necessary Equipment: Before you start the installation, collect all required tools and equipment, including telemetry sensors, wiring, connectors, and a compatible data acquisition system. Refer to your telemetry system’s manual for specifics on model compatibility.
2. Plan Sensor Placement: Determine the optimal locations for each sensor. Common placements include the engine bay for temperature and pressure sensors, wheel wells for speed sensors, and chassis for acceleration sensors. Ensure each sensor can easily connect to the central data acquisition unit.
3. Prepare the Vehicle: Safely lift the vehicle using a jack and secure it on jack stands. This allows for easy access to critical areas for sensor installation. Disconnect the battery to prevent electrical issues during the process.
4. Install Sensors: Following the planned placements, begin installing the sensors. For temperature sensors, drill holes as needed and securely mount them using appropriate brackets or clips. Ensure that pressure sensors are properly sealed to avoid leaks. Connect speed sensors to the wheel hubs or axles, making sure they align accurately for reliable readings.
5. Wiring Connections: Carefully route the wiring from each sensor to the data acquisition system. Avoid areas that may expose the wires to heat, moisture, or mechanical damage. Utilize cable ties to secure the wiring and maintain a clean installation. Connect each sensor to the corresponding input on the data unit, following the wiring diagram provided in your telemetry system’s manual.
6. Calibration: Once all sensors are connected, turn on the vehicle’s ignition and access the telemetry system interface. Follow the calibration procedures for each sensor to ensure they provide accurate readings. This step is crucial for data reliability during races.
7. Testing and Validation: After calibration, perform a series of test runs to validate sensor functionality. Monitor the telemetry data in real-time to check for inaccuracies or abnormalities. Make any necessary adjustments to sensor positioning or connections based on the data received.
8. Finalize the Installation: Once testing is complete and all sensors are functioning correctly, secure any loose wiring and cover exposed connections for protection. Reinstate the vehicle’s battery and lower it from the jack stands.
By carefully following these steps, you will successfully install a basic telemetry system in your race vehicle, enhancing your racing tech capabilities and performance insights.
Integrating Telemetry Data with Race Management Software
Integrating telemetry data with race management software is crucial for maximizing performance and efficiency on the track. A seamless connection allows teams to analyze real-time data and make informed decisions during races. The integration process typically involves configuring the telemetry system to communicate with the software, enabling data transfer for analysis and visualization.
To start, ensure that the telemetry tech is properly installed in the racing vehicle. This includes sensors for speed, tire pressure, engine temperature, and other vital metrics. Once the telemetry system is operational, it is essential to install compatible race management software that can process and interpret the incoming data. Look for software that supports various telemetry formats, allowing for smooth integration and accessibility of data.
After installation, establish a communication protocol between the telemetry system and the race management software. Most systems utilize wireless connections to transmit data in real-time, which requires setting up the correct network configurations. Verify that your software can receive and display this telemetry data as intended.
Once connected, calibrate the system to ensure accuracy in data collection. This step may involve testing the sensors and verifying readings against known benchmarks. Regular calibration is essential to maintain data integrity, enabling teams to rely on the telemetry to inform race strategies effectively.
Finally, harness the power of data visualization tools available within the race management software. These tools help in interpreting telemetry data, allowing teams to identify patterns, track performance over time, and make strategic adjustments. With this integration, teams can optimize their race strategies based on real-time feedback from the telemetry system.


